
CUSTOMER GUIDE · IT DIGITEC
How to create a support ticket
A ticket records your request so the team can follow up on the problem. Explain what is happening and how it affects you. You do not need to create an account.
The ticket form and screenshots use Spanish labels. This guide explains those labels in English. Select an image to enlarge it; on a phone, you can scroll inside the enlarged image to read each field. The numbers match the explanations below each image. All instructions are also written out.
1. Start and enter your details
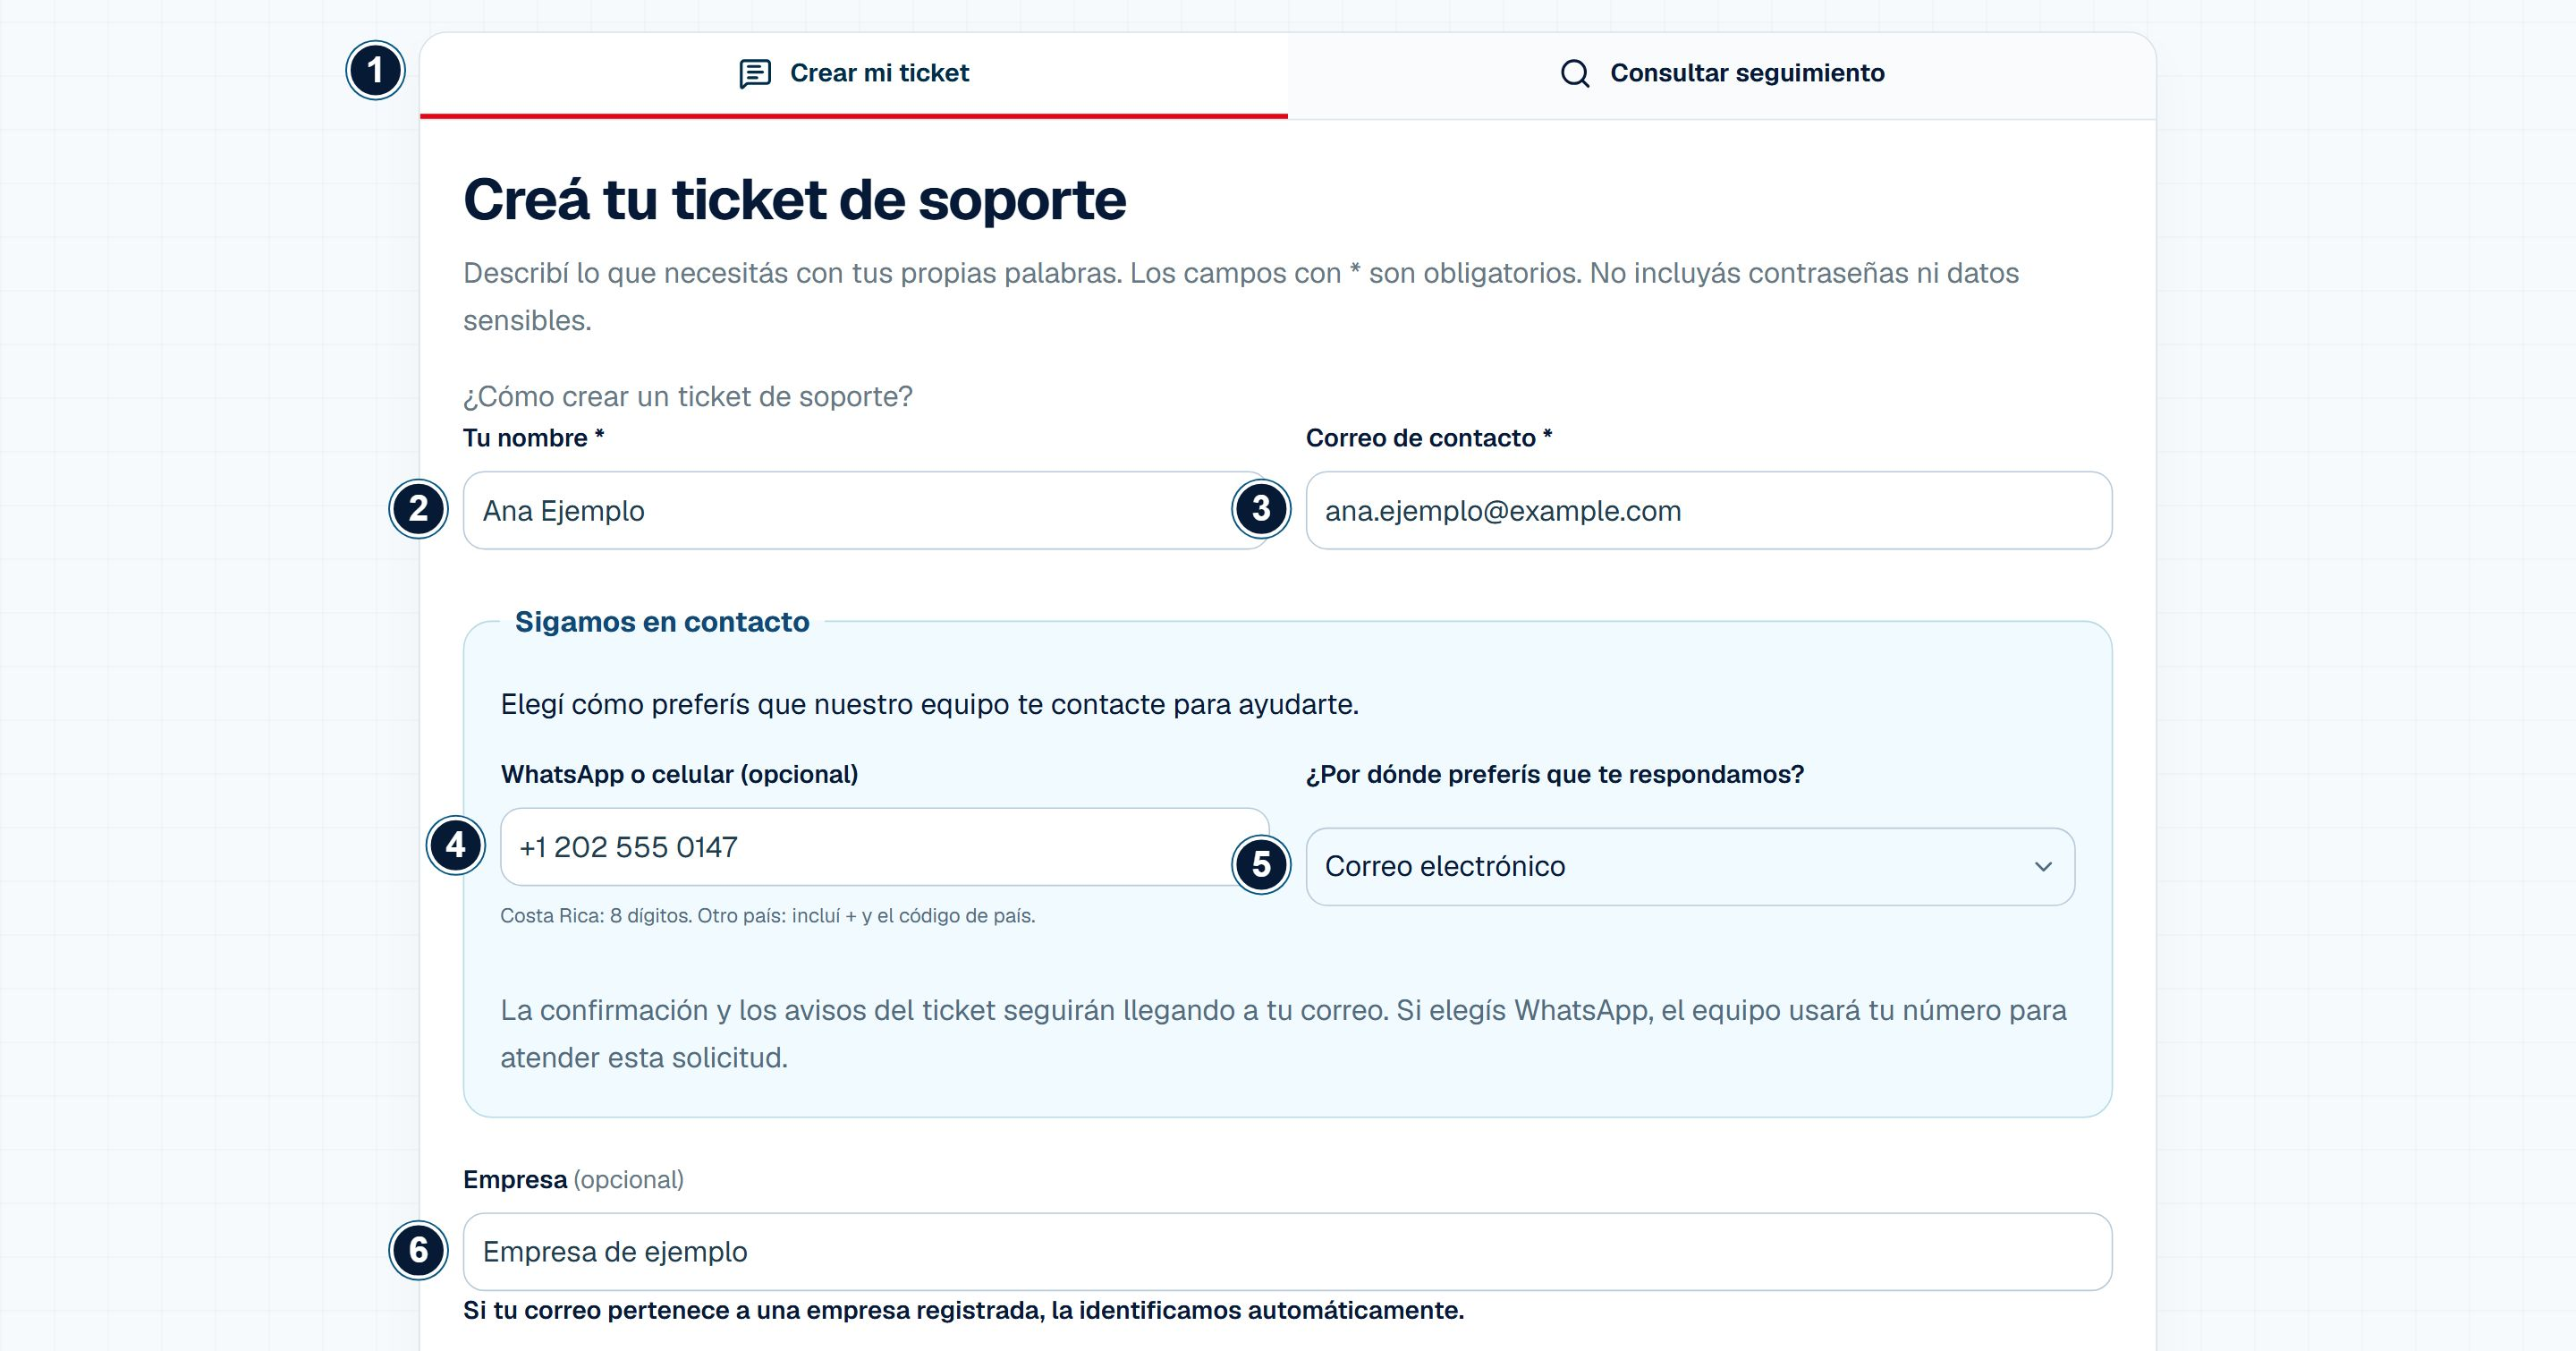
- Crear mi ticket: open the form.
- Tu nombre: enter your name.
- Correo de contacto: check your email address.
- WhatsApp o celular: enter your number if you prefer WhatsApp.
- ¿Por dónde preferís que te respondamos?: choose the contact method.
- Empresa: optionally enter your company name.
Select the image to enlarge it.
Open the portal
Go to soporte.itdigitec.com and find the form headed Creá tu ticket de soporte. If you are viewing a previous request, select Crear mi ticket to open the form.
Enter your contact details
Enter your name in Tu nombre and your contact email in Correo de contacto. Check both before continuing.
Under ¿Por dónde preferís que te respondamos?, choose email or WhatsApp. If you choose WhatsApp, complete WhatsApp o celular with your number.
You can enter your company name in Empresa (opcional).
2. Describe the problem and review the options
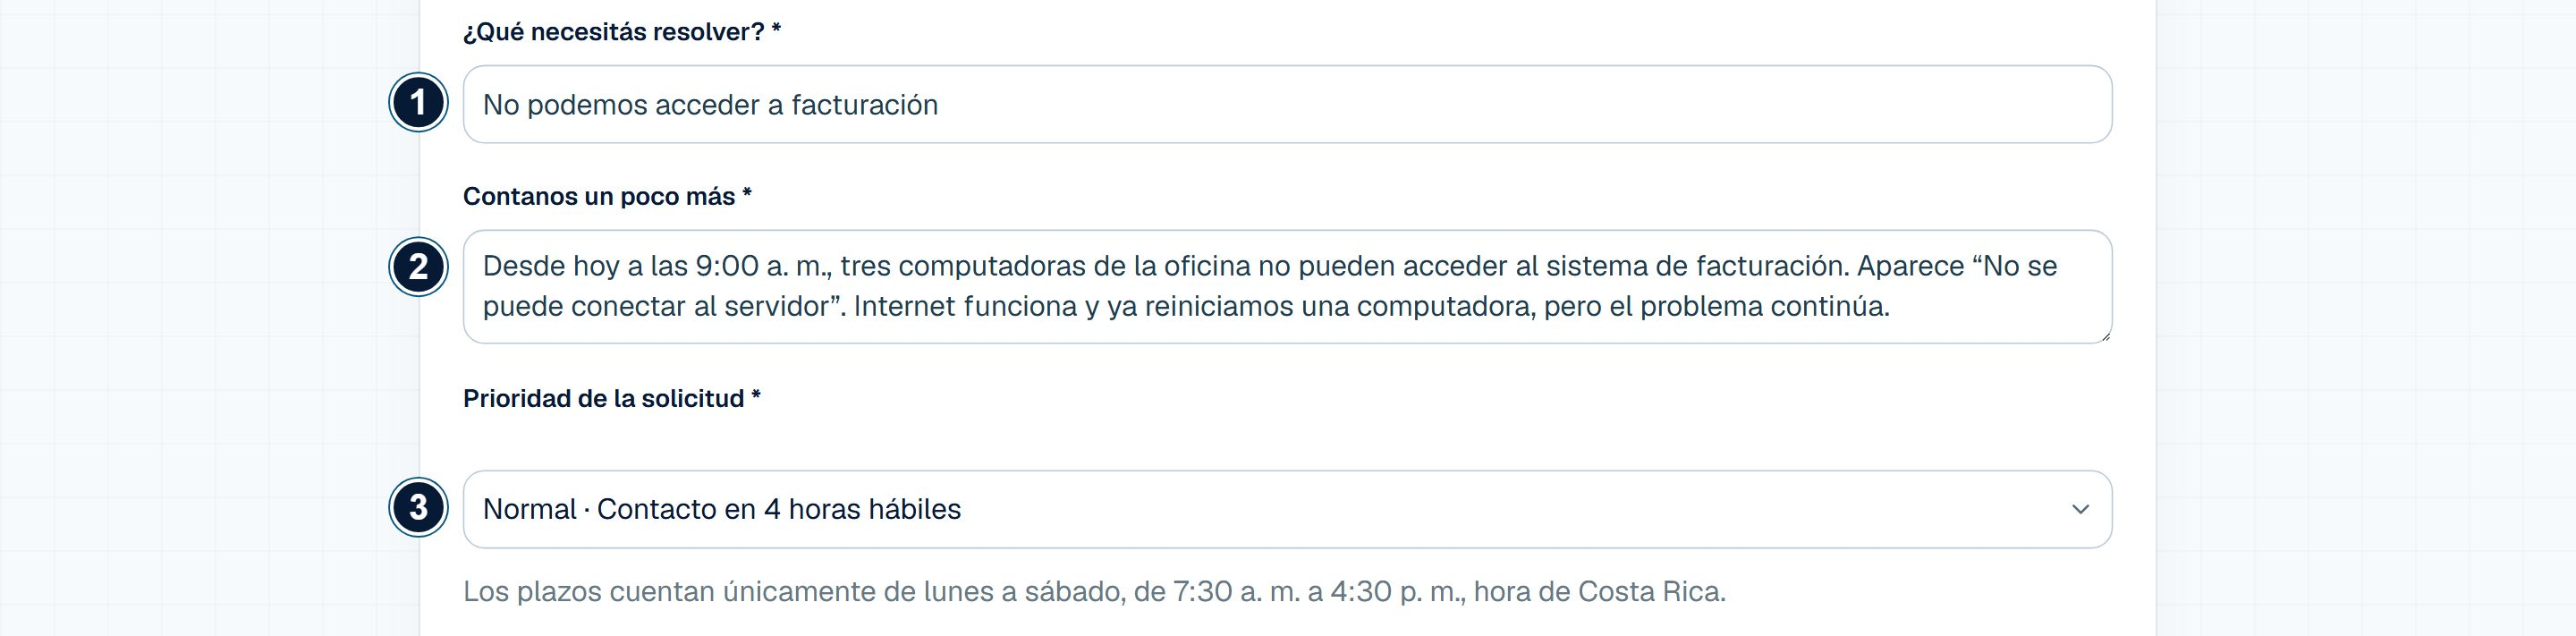
- ¿Qué necesitás resolver?: enter a short subject.
- Contanos un poco más: explain what happened, when it started, who is affected and what you checked.
- Prioridad de la solicitud: choose the option that matches your case.
Select the image to enlarge it.
Describe the problem
In ¿Qué necesitás resolver?, enter a short subject.
In Contanos un poco más, describe the affected service or device, what you were doing and what happened. Copy the exact error message if one appears.
Explain when the problem started, whether it affects one person, several people or the whole company, and which checks you have already tried.
Review Prioridad de la solicitud and choose the option that matches your case.
3. Add files, review and locate the submit button
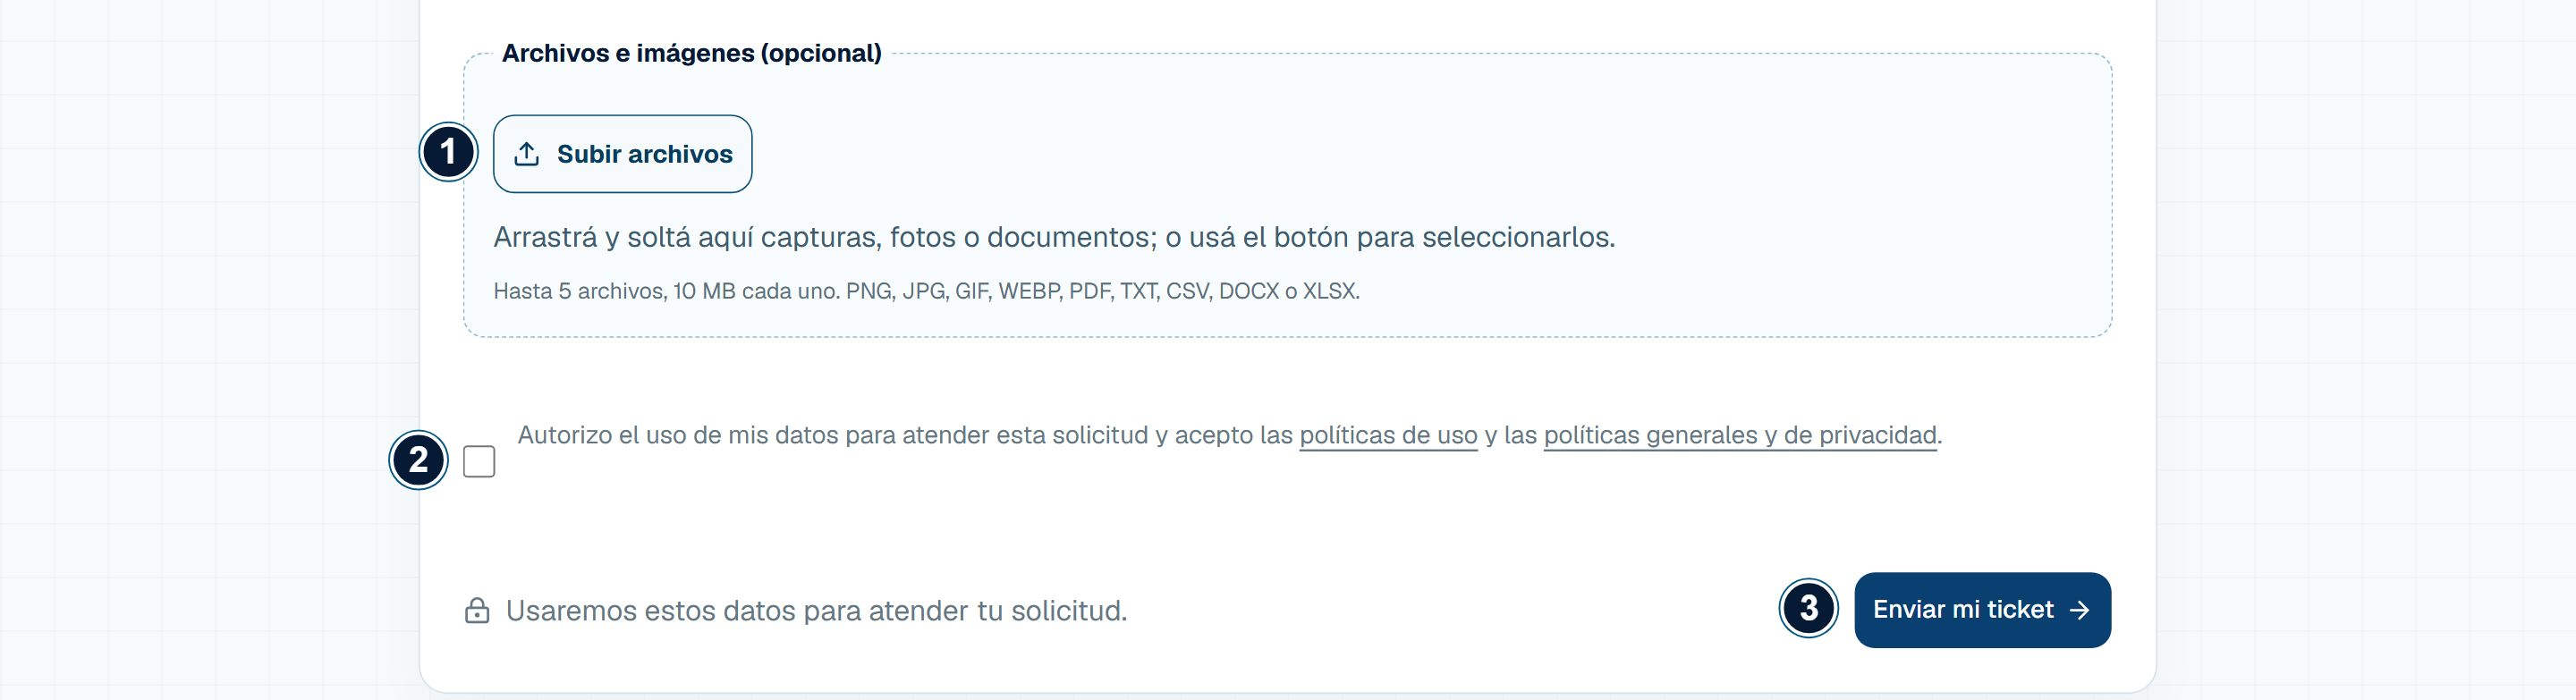
- Subir archivos: add a useful screenshot or document if needed.
- Authorization and policies: read them before selecting the checkbox.
- Enviar mi ticket: check your details and problem description before submitting.
Select the image to enlarge it.
Add a useful screenshot or photo
Under Archivos e imágenes (opcional), select Subir archivos or drag your file into the upload area.
You can attach up to 5 files of 10 MB each. Check that they do not contain passwords or sensitive information.
Review and submit
Check your information. Read the linked policies and select the authorization and acceptance checkbox before submitting.
Select Enviar mi ticket. Wait for the on-screen confirmation. Clicking the button alone does not prove that your ticket was created. If an error appears, read it before trying again.
Keep your tracking details
When Solicitud recibida appears, keep the ticket number and the Clave de seguimiento (tracking key). You can use Copiar clave to copy the key.
The tracking key is private. Do not share it. To check progress, select Consultar seguimiento and enter the key.
Example problem description
“Since 9:00 a.m. today, three office computers cannot access the invoicing system. The message says ‘Cannot connect to the server’. Internet works and we restarted one computer, but the problem continues.”
Protect your information and avoid duplicate tickets
Do not include passwords, verification codes or bank details in your ticket or attachments.
Avoid creating another ticket for the same problem. To add information, open the existing ticket through Consultar seguimiento and use its reply option.